The Ultimate Guide to Stretching Your Fitted Hat
Updated: November 24, 2023
111
Do you get tired of wearing a hat that feels like it is squeezing your brain all the time? There is a question in your mind that arises: Will a tight hat stretch out over time? And how to stretch out fitted hat? It’s happened to all of us. Don’t worry! We’ve got the ultimate guide to stretching your fitted hat right here.
Fitted hats sometimes don’t fit quite right. Whether it’s because you accidentally bought the wrong size or your head has increased in size, wearing a fitted hat that is too tight can be uncomfortable and even cause headaches. No matter how awesome the new one is or how old the old one is. But fear not! In this blog post, we’ll share some simple and effective ways to stretch your hat and make it more comfortable. It’s time to say goodbye to those pesky tight-fitting hats once and for all!
Factors Affecting Hat Size
Before discussing methods of stretching your fitted hat, we must understand why hats might feel too tight. Hat size is affected by the following factors:
- One of the main reasons is our heads are unique in shape and size. Just like how no two feet are exactly alike, our heads also differ in size and shape from person to person.
- Another factor that affects hat size is material shrinkage. The material on your hat has likely shrunk after being washed multiple times or kept under direct heat or sunlight for an extended time.
- Some people may experience changes in head sizes due to weight gain or loss. These changes can affect how hats fit on their heads.
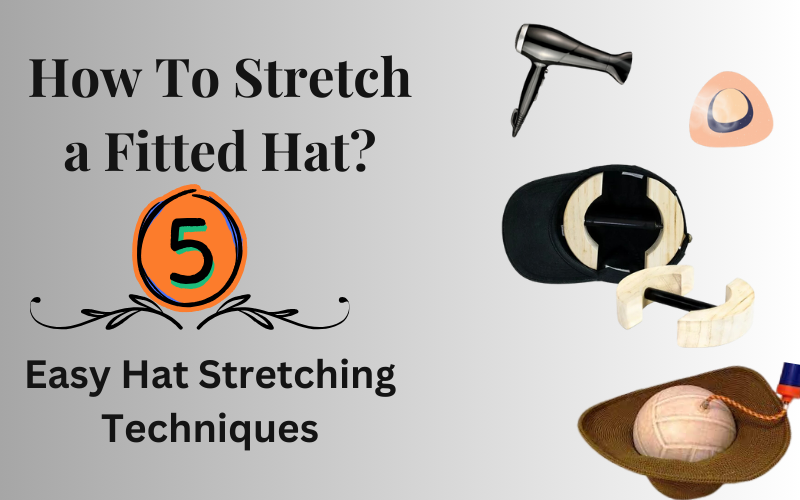
Hat Stretching Methods
- Steam Method
- Hat Stretcher
- Hair Dryer Method
- Ice Method
- Stuffing Method
Stretching Your Fitted Hat With Steam

Stretching your fitted hat with steam is a simple method to stretch it out and make it more comfortable. Using steam to loosen the hat material, allowing it to expand and fit your head better. Here’s how to use the steam method to stretch your fitted hat:
Step 1: Get Your Materials Ready
To use the steam method, you will need a few basic materials such as:
- A tea kettle or pot for boiling water
- A bowl or sink filled with cold water
- Wear gloves when handling hot water
- A towel
Step 2: Boil Water
You will need to fill your teapot or kettle with enough water for steaming and bring it to a boil on the stove.
Step 3: Place Hat Over Steam
As soon as the water starts to boil, carefully hold your fitted hat over the steam for about 30 seconds while it is still hot. You should avoid getting too close to the hat to prevent it from being damaged (especially wool hats). The heat from the steam will help soften and loosen up the material of the hat.
Step 4: The Hat Can Be Shaped As Desired
When you have finished steaming your head, quickly remove the hat from above the steam and fit it on your head. By doing this, you will be able to stretch it in a way that suits your liking. If you only want a general stretch, simply put on the hat and let it dry. You can stretch specific areas (e.g. near the place where you sit) if you want.
Step 5: Testing the Fit
After the stretching period, it’s the moment of truth. Remove the stretcher and try on your hat. If it’s still a bit tight, repeat the process until you achieve the perfect fit.
Learn more, Still Curious? Click here to find out How should a hat fit?
Hat Stretching with steam Video Tutorial
Stretching Your Fitted Hat with Hat Jack

Getting the right fit for your hat can be a challenge, especially if you want to keep the shape and quality of the hat. Hat Jack is the ultimate solution for stretching hats precisely and easily! The Hat Jack can stretch your favorite headwear, whether it’s a cap that’s just a tad too snug or a vintage fedora that needs an adjustment. Experience customized comfort instead of uncomfortable hats – let’s get started!
Note: You should steam the inside band of your hat before you apply the hat stretcher inside the hat.
Step 1: Decide What kind of Hat You Wear
I would like to emphasize that prior to tackling the stretching process, it is important to determine the material and condition of the hat. The Hat Jack is suitable for various types of headwear, including caps, fedoras, and even cowboy hats. Be sure that the hat’s material is able to be stretched without losing quality or shape.
Step 2: Insert the Hat Jack
Once you’ve determined that your hat is suitable for stretching with the Hat Jack, it’s time to insert this magical tool. Place the Hat Jack gently inside your hat, and make sure that the position of the Hat Jack is such that it allows even stretching throughout the entire hat.

Step 3: Making the Size Adjustments:
The next step is to adjust the hat’s size! Rotate both sides of the Hat Jack simultaneously to expand its width. Without causing any damage or distortion to your hat, this action will stretch it out effectively.
Step 4: Let It Sit for a While:
If you have adjusted the size of your hat and Hat Jack combo in order to fit you correctly, then allow them to work their magic for some time. Leave them undisturbed overnight or for at least several hours so that they can gradually mold together.
Step 5: Take off the Hat Jack and Enjoy:
Once an adequate amount of time has passed, it is time to remove the Hat Jack from your newly stretched-out hat. You will have to take great care when removing it by rotating it back inwards until both sides are loose enough to slide out smoothly.
Video Tutorial
Stretching Your fitted Hat with Hairdryer Method

Fitted hats can be stretched out using the hairdryer method. The heat from a hairdryer loosens the hat’s fibers, which makes it easier to stretch and mold to fit. The following steps will help you stretch your hat:
Step 1: Gather Your Materials:
A hairdryer, a bowl of hot water, and your fitted hat are all you need to get started. To control the temperature of your hairdryer, make sure it has adjustable heat settings.
Step 2: Get Your Hat Ready:
Make sure your hat is free of dirt before starting. Make sure no particles get stuck in the fabric while stretching. If necessary, gently hand wash the hat with mild soap and let it dry completely.
Step 3: Warm up your hat:
Fill a bowl with hot water (not boiling) and dip the front part of your hat into it for about 30 seconds. This will soften the fabric fibers and make them more pliable for stretching.
Step 4: Use a hairdryer
Get your hairdryer out. Turn on the medium heat setting of your hairdryer. You will want to hold it approximately six inches away from where you want to stretch the hat, which is usually around the brim or sides of the hat.
Step 6: Stretch the hat out
When you are heating the hat, use your hands to gently stretch the area that has the problem. As you blow hot air onto the dampened area, gently pull and stretch the material in all directions until you reach your desired size. You can widen the crown by stretching it with your hands. You can stretch the brim by hand or place it over a rounded object like a bowl to maintain the desired shape.
Step 7: Hold the Shape
After you have stretched the hat to the desired size, you should hold it in the position you just stretched it to until it cools down. The hat will retain its new shape this way.
It is possible to repeat the process if the hat has not stretched enough. Be cautious not to overstretch, as you can’t shrink a hat back down.
Step 9: Dry the hat completely
Wear the hat after it has dried completely. By doing so, it will maintain its stretched shape.
Although this method is effective for minor adjustments, it may not work for all hat materials. Some hats may require professional stretching to avoid damage. Always check the care instructions for your specific hat and proceed with caution.
Ice Method
I know you are shocked but yes, you can try this method. It works.
The Ice Method is a technique used to stretch cotton or canvas hats. Using this method, you can take advantage of the fact that water expands when it freezes, causing the material of the hat to stretch as the ice forms, which causes the hat’s shape to be distorted. Here’s a step-by-step explanation of the process:
Materials:
- large Size Plastic Bag
- Ice Cubes
- A Fitted Hat
Steps:
- Take a plastic bag and fill it with ice cubes. Ensure that the bag is large enough to accommodate the areas of the hat you want to stretch.
- Put the ice-filled bag into the hat, targeting the specific areas you want to stretch. This method allows you to focus on stretching particular regions, such as the crown or brim.
- Put the hat with the ice-filled bag inside into the freezer. Allow enough time for the water in the bag to freeze completely, turning it into solid ice. This usually takes a few hours.
- Once the ice is solid and has served its purpose in stretching the hat, remove the hat from the freezer. Take out the plastic bag with the ice.
- Let the hat thaw naturally at room temperature. This step is crucial as it allows the frozen material to gradually return to its original state. The warming and melting of the ice cause the fibers of the hat to relax, retaining their stretched shape.
- The melting ice will create more space within the hat, contributing to the stretching process. As the hat thaws, it will retain the shape achieved during the freezing phase.
This method is particularly suitable for cotton or canvas hats because these materials are more responsive to changes in temperature and moisture. It’s essential to be cautious and monitor the process, ensuring that the hat doesn’t get overly stretched or damaged. As with any stretching method, it’s advisable to test it on a small, inconspicuous area of the hat first to avoid any potential issues
The Stuffing Method: Step-by-Step Guide
By following the step-by-step guide for the stuffing method, you can easily stretch your hat without causing any damage.
Step 1: Choosing the Right Stuffing Material
To stretch your fitted hat using the stuffing method, you’ll need materials. You should choose soft, pliable items that can fill up the interior of your hat without damaging it. You can use towels, t-shirts, or even socks as good options.
Step 2: Get your hat ready
Before starting, make sure your hat is clean and free from dirt or dust. This will ensure it doesn’t get stained during stretching. Gently wipe away any surface dirt with a damp cloth.
Step 3: Shape the stuffing material
Mold the stuffing material into a shape that closely resembles your head size when wearing the hat. It should be firm enough to provide gentle pressure, but not so tight that it distorts the hat’s shape.
Step 4: Insert the Stuffing
Fill your fitted hat with the shaped stuffing material, distributing it evenly. Avoid overstuffing in certain areas to avoid unnecessary stretching.
Step 5: Let It Sit
Once you’ve stuffed your hat, let it sit for at least 24 hours or longer if needed. This will allow fabric fibers to relax and adjust to their newly expanded state.
Stuffing is a simple yet effective way to stretch out a fitted hat without straining its structure. Try this technique and see how it works for you! If you find this method useful, let us know in the comments.
Stretched Hat Maintenance Tips
The next step is to maintain the shape of your fitted hat once it has been stretched successfully. The following tips may be helpful:
1. Gently handle: Make sure you treat your stretched hat gently to prevent it from being damaged or misshapen. Avoid crushing or folding the brim and be mindful when placing it on surfaces.
2. Ensure proper storage: If your hat is not in use, store it in a cool, dry place away from direct sunlight and moisture. Use a hat rack or box designed specifically for storing hats to help them retain their shape.
3. Clean carefully: Make sure to follow the manufacturer’s instructions when it comes to cleaning your hat, as different materials require different methods of cleaning. Spot clean stains with mild detergent and water rather than submerging the entire hat.
4. Support during transportation: If you need to pack your stretched hat for travel, consider using support such as tissue paper or bubble wrap inside the crown to maintain its shape during transit.
5. Rotate usage: In order to prevent excessive wear and tear on one particular part of the hat, it is advisable to alternate between several hats when wearing one hat.
If you follow these tips, I am hoping you will be able to keep your stretched fitted hats looking fantastic year after year, ensuring they will last for many years to come. Hopefully, these tips will help you to continue to get the most out of your hats.
Final Thoughts
Stretching your fitted hat can be a game-changer when it comes to comfort and style. No matter what method you choose, there are effective techniques that you can use to achieve the perfect fit.
Stretching your fitted hat is invaluable knowledge whether you want a tighter fit or wish to revive an old favorite. With patience and care, these methods will allow you to enjoy comfortable headwear that complements your style perfectly!
Now it’s time for you to comment on the article which method you tried and how it worked for you.
How many ways can a fitted hat be stretched?
Stretching a fitted hat can be done in several ways, depending on the material of the hat and the degree of stretch needed. Here are a few common methods:
1. Water and Steam Method
2. Heat and Hairdryer Method
3. Freezing Method
4. Use a Hat Stretcher
5. Wear the Hat
6. Use a Ball
7. Towel Method
8. Commercial Hat Stretching Sprays
How long does it take for stretching to occur from wearing hats and ponytails every day?
The time it takes for stretching to occur from wearing hats and ponytails every day can vary depending on factors such as the tightness of the hat or ponytail, the elasticity of the hair, and individual differences in hair resilience. However, continuous and tight pulling or pressure on the hair and scalp can lead to gradual stretching and potential damage over time.
It’s essential to be mindful of the tension placed on your hair and scalp to prevent issues like traction alopecia, which is hair loss caused by constant pulling. If you notice signs of discomfort, redness, or hair breakage, it’s advisable to loosen the ponytail or switch to a looser-fitting hat to reduce stress on the hair and scalp. Regular breaks from tight hairstyles can also help prevent long-term damage.
How much can you stretch a hat for better fit?
The amount a hat can be stretched depends on factors such as the material, construction, and stretching method. Here’s a quick guide:
Fabric Hats: Materials like cotton or wool can typically be stretched to a small to moderate extent based on their flexibility.
Synthetic Hats: While synthetic materials may have less stretch compared to natural fibers, some blends can still be stretched to a certain degree.
Knit or Crocheted Hats: These, especially if made with stretchy yarn, may offer more give than woven materials.
Hat Stretchers: Designed for controlled stretching, hat stretchers can be effective. However, be cautious not to overstretch, as it can damage the material.
Caution with Overstretching: Excessive stretching may lead to deformation or damage. Start with gentle methods and gradually increase if needed.
Consider the Style: The style of the hat matters; for instance, a baseball cap with a rigid front may have less give compared to a more flexible beanie.
Remember, it’s crucial to avoid overstretching, as it could compromise the hat’s shape. If you encounter resistance or signs of stress, consider alternative solutions or consult with a professional.
Please Write Your Comments